Last night was Quilting night, however, it was an abbreviated evening. My wife did not have to work last night, and the neighbor's daughters spent the night at our house last night. It's fun to have 4 & 6 year old giggles in the house again, but I'll admit, it's nice to be able to send them home!!
Up until last summer my wife cared for these two girls while their mom was at work, but last summer mom decided to quit her workplace job and assumed the job of full time mom. Since the girls had been at our home daily since they were born, they really are like part of the family, and my wife could not say no when they asked if they could have a slumber party! So my daughter Chyenne (10), my wife Trish, Maddie and Cam all had a fun evening of painting finger nails and working on little crafty things. Unfortunately, they were using MY quilting space.
So, I watched some TV and surfed the web, patiently waiting for access to the space I needed, and when they finally went to sleep, I got to work.
I finally finished trimming the HSTs and thought about starting to piece the big Stars and Stripes quilt together, but decided I needed a break from the Stars and Stripes, and I only had about an hour to sew. I do not want to feel rushed on that project, so I finished my Block of the Month Blocks and I worked on my "Summertime Fun" quilt.
Here are my two BOM blocks... Note how terribly out of square they are. You may recall that last week I mentioned that I had accidentally put a 3/8" foot on my machine that I didn't even know I had... Well, apparently I had that foot on my machine when I pieced the center part of these blocks two weeks ago. Last night I pieced the sashing, and now I have my usual 1/4" foot on my machine...
So, NONE of my corners matched up. I marked centers and had the first one completely pieced before I noticed. These blocks are so simple and they have always just matched up perfectly, but last night I was watching TV, not devoting my full attention to the sewing, and the result is obvious.
I decided to piece the second one exactly as I had the first one. I am going to purchase some more fabric and re-do this block set using the correct foot for ALL pieces. I learned something, so it wasn't a complete waste of my time, right?

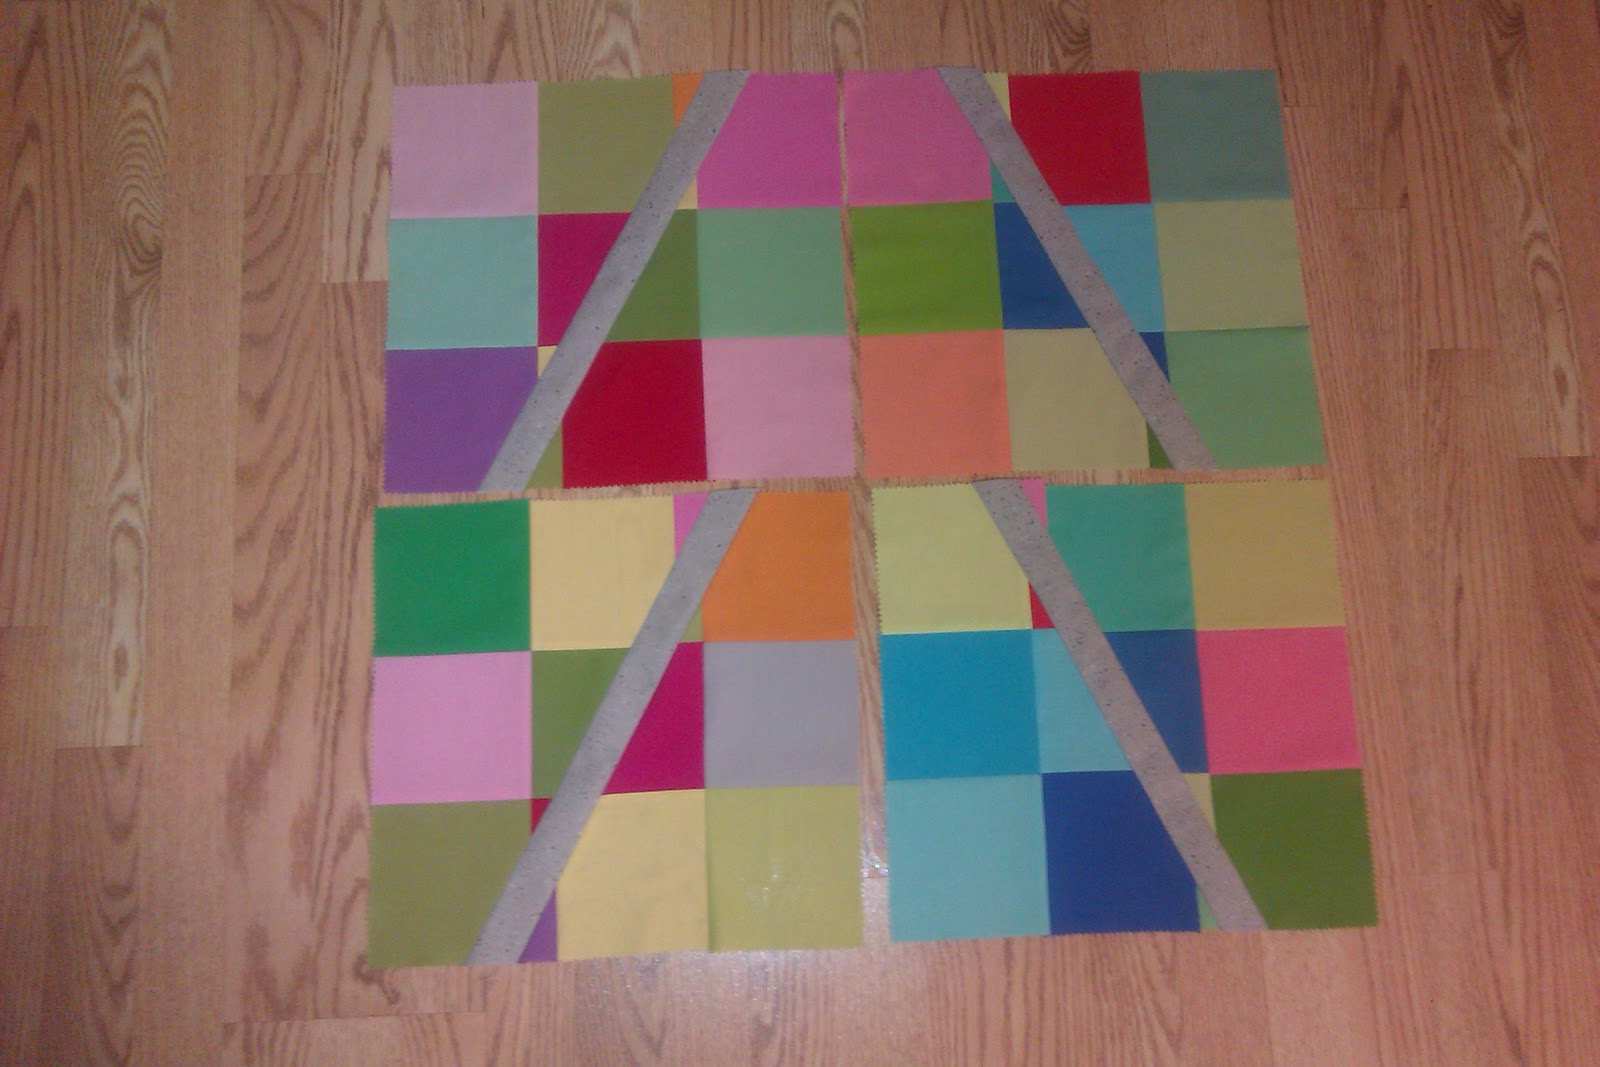
I also worked a little more on "Summertime Fun", my donated charm pack quilt. I decided to try something different with this charm pack... I assembled 4 nine square blocks, each ~15"x15" (A,B,C,D) and then I set one on top of another (A on B and C on D), and randomly cut them in half on a diagonal. I then attached the left of A to the right of B, the left of B to the right of A, left of C to right of D, and left of D to right of C. I put a 2" strip (1.5" after sewing) of my grey pebble foundation material between each of the halves I cut.
I am thinking I am going to do another random cut and reassembly but this time Stacking A&C, and B&D, but I am not yet sure... Here are some Pictures of "Summertime Fun"...
The Four Nine Patch Blocks (A,B,C,D)

A on B (lines are matched up)

The first Diagonal Cut (A&B)

The Second Diagonal cut (C&D)

The Re-Assembled blocks...
I also happened to stop in an antique store recently and found these treasures...
My Grandfather had one of these!! He got all "high tech" and purchased an electric Typewriter, but he kept his old black "Whack and Slap" typewriter close by. Seeing this brought back many memories about Grandpa...

This little gem has never been opened!! I tried to find a date on the box, but was unable to. I am guessing it is older than I am!

And this does NOT belong in an antique shop! I bought this album the day it was released, and I am NOT antique. (Getting Old, but someone PLEASE tell me I am not "Antique"!)

OH, and look at what arrived in the mail... My Kona Solids for the Kona Solid Swap... I labeled them up and I will send them off tomorrow. In about 4 weeks, I'll receive 12 FQs back...

I hope to get some extra quilting time in this weekend after I clean the garage and change the oil in the vehicles. I need to start piecing "Stars and Stripes"!
Until Next Time,
Paul


