Showing posts with label Baby Quilt. Show all posts

Saturday, December 13, 2014

Baby Quilt - Part Two...

As I mentioned in the previous post, I failed to take as many photos as I have in the past, so there were quite a few steps between the end of the previous post and the beginning of this one, but here is the completion of the Baby Quilt...

I always lay out my layers on the floor and tape them down using painters tape, so the backing went down first, then the batting, and then the top.
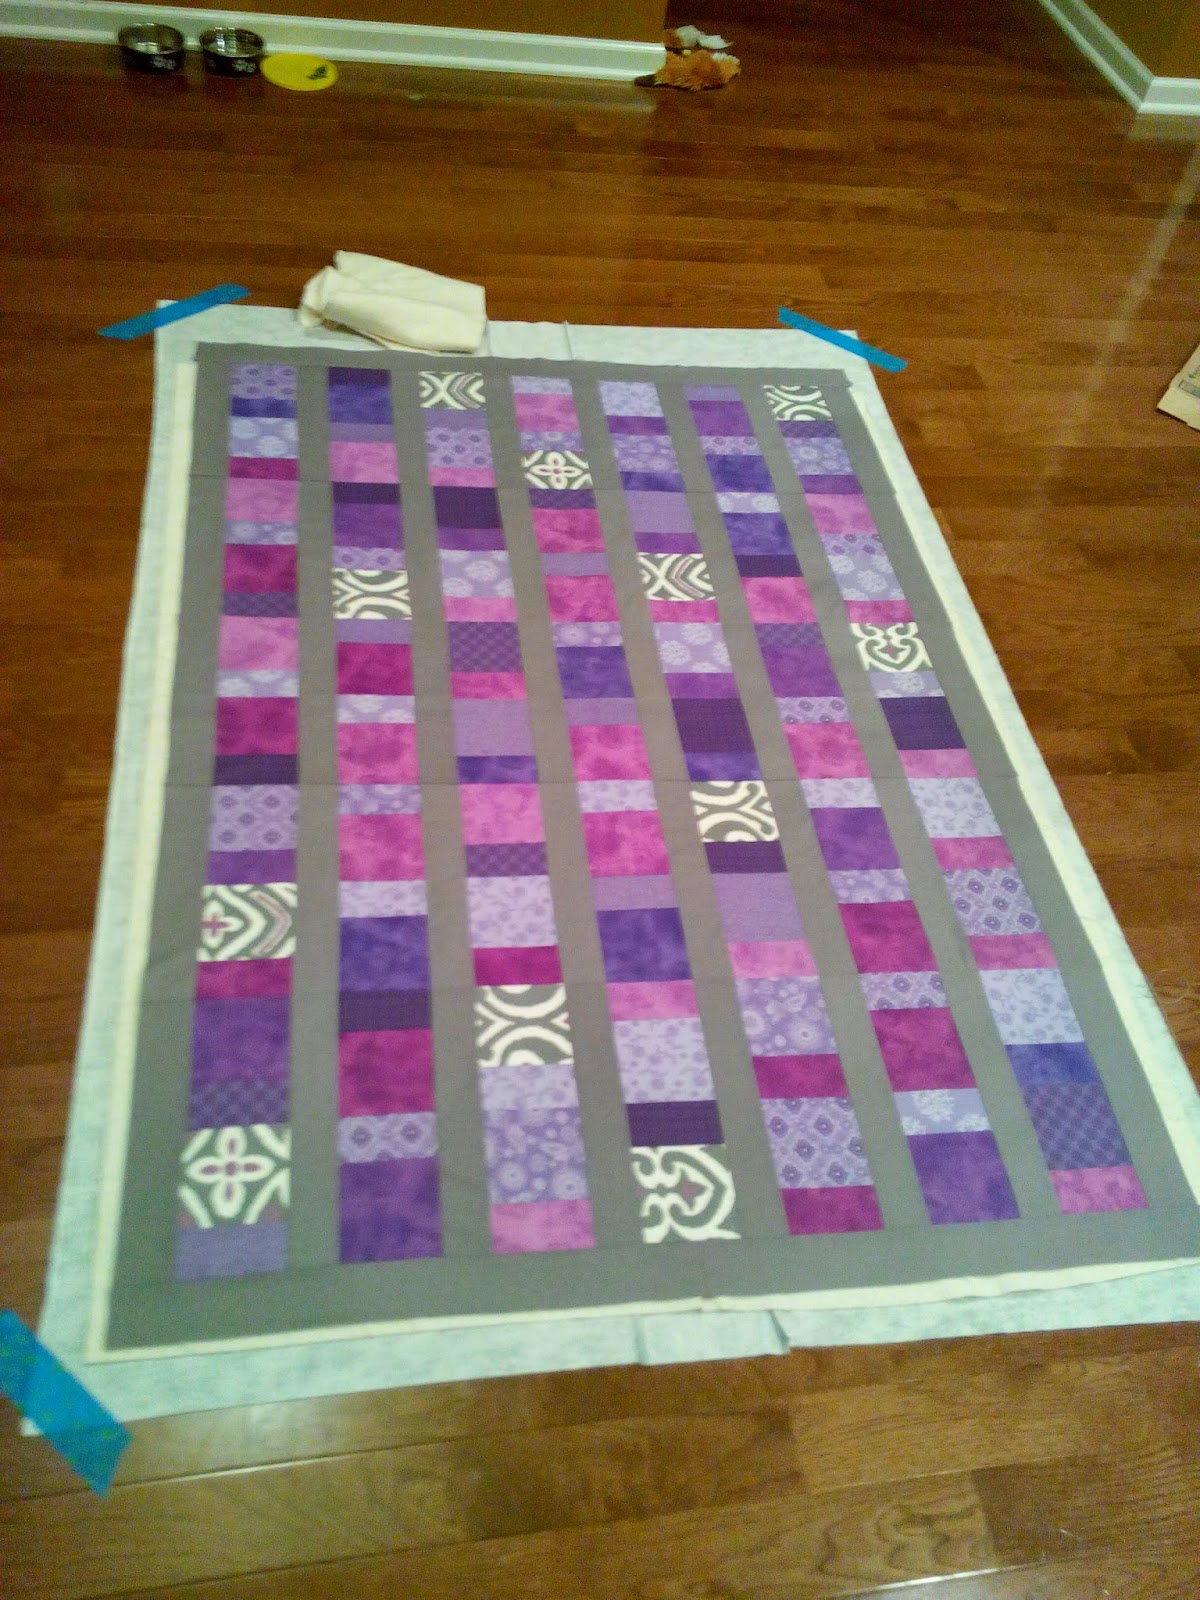
Layed out and ready for pinning...


I dump a bunch of pins and then start pinning...


I try to put pins about every four inches.  For this quilt, I planned to do straight line quilting around the purple columns, inside the purple columns and then use a decorative stitch straight down the center of the purple columns.


While out shopping one day, I happened to find the same fabric that Grandma had used to cover the rocking chair, and I picked some up to use as binding.  I think stripes, polka dots, or any swirly pattern works great for binding and when I initially saw the fabric, I knew it would be perfect for binding, but there wasn't quite enough, so I was super excited to find the same fabric so I could bind this quilt using it.

I will always opt for cutting my binding fabric on the bias if I have the choice.
It makes laying that binding flat SO much easier...
Though it is bit of a pain to cut it!
Then I press together and roll onto a large spool.
I use hair clips to keep my binding in place while I sew.
I didn't get a real good photo of the full quilt, but
here is about half of it...
And the last step is secure the label under the binding, this way I only have a small amount of hand stitching to secure the label for future posterity.

Simple Hand Written label, and the gift was ready to be given.
I made this Baby Quilt much larger than a traditional baby quilt because I wanted it to be large enough for mom or dad to snuggle with baby while rocking in that rocking chair with the matching fabric.

And THIS is why we all do what we do...

Baby and Mother cuddling under the quilt...
There can be no better way to see one of my quilts!

Hopefully I'll be able to post some more next week.  I am working on two projects right now.  One I can share, and one I can not... Yet... So while posts are being written, none will be seen unless I can carve out time to actually work on Bonnie's Mystery.

Until His work in me is complete,
Paul

Monday, May 21, 2012

Baby Quilt FINISH!!

My daughter's dance instructor is having a baby so I made a baby quilt for the new addition to Miss Dawn's family.  This is their first child and they are very excited...

Here are some photos of my most recent finish.

Animal Nursery print with tan batiks.
Simple Checkerboard Quilt, straight line quilted
3/8 or an inch from all seams.
Border done in a simple dark brown to contrast all of the light colors
in the main body of the quilt.  Also Bound in the same dark brown.

 
Backside view of the straight forward, simple quilting.
The green polka dot backing was chosen as the nursery was done in light green.

Another view of front and back of quilt.
And what would a post be without a kitten photo...  Having kittens in the house if fun and at times a little trying... While I was basting the baby quilt my kitten was playing "King of the Hill" sewing machine style...

When I stood up and saw him atop my machine, it
took everything in me not to chastise him.  I calmly got
the camera, snapped this shot, and then when I picked
him up to tell him the top of my machine was "NO" place
he looked right up at me with those beautiful green
eyes and started purring, almost as if to say,
"Are you REALLY mad at me right now!?"

The joys of kids and kittens!

Until Next Time,
Paul

Friday, April 6, 2012

Thursday Quilt Night Returns

WELL, Last night, I returned to my quilty ways for a Thursday evening...

A friend of mine is having a baby, so I decided to make her a baby quilt.

I decided to do a very simple checkerboard design (because I could start and finish the top in one night), sat down, did some math and headed to the store to buy some fabric. 

So, there I was last night cutting, sewing, cutting, sewing, watching the DVR the entire time, when I suddenly realize that I have sewn an ENORMOUS number of 4 inch finished squares!!  So many, that I decided to count and I quickly realize that unbeknownst to me, I had inadvertently doubled my math and purchased twice as much fabric as I needed.  And since I didn't even notice until I had finished cutting and sewing the squares into rows, I now have a two night project to complete TWO baby blankets!

Oh, well, I guess I'll have an extra baby blanket... Maybe I'll put it up on the Etsy shop...

I did remember to take a few photos though...

My fabric selection.  The print and the Batiks will be checkerboarded
with the stripe being the binding and the solid tan will be the backing.

 
My Batiks, cut into 4.5" x 18" pieces, ready to be sewn
to similar piece of print

Here's the Zoo animals, all cut up and ready to piece!

CHAIN PIECING!!!

MORE CHAIN PIECING!!
 Next sew time will be spent pressing those bad boys so I can begin joining rows...

And last night for dinner, I exercised my other creative outlet...

PORK LOIN
Cooked in Olive Oil, then I tossed in some Diced Peppers, Onions and Tomatos


Whole Wheat Spaghetti Pasta with a Basil Pesto

DINNER...
And very few calories to boot!

Thanks for stopping by,  Hope to see you all again soon,
Paul


Tuesday, August 9, 2011

Something NEW out of something OLD

About two weeks ago, I had a post named "What to do with this Bargello..." where I talked about this old Bargello that has been sitting in my WIP drawer for too long.  I had several ideas and after your comments and a sudden undeniable desire to do something NEW, I decided to make a Baby quilt out of it.  I decided to make a colorful back and dug into my stash.

My calculations told me I needed 10 FQs, so I chose some bright
colors and a White w/ Black Polka dots and set off to make a
6" block checkerboard with bright colors and White squares.
Before sewing I always make sure my blocks are properly squared
and match in size


This was a quick and easy project, cut 6.5 inch squares, sew them together in 9 rows of six, color, white, color white.  Quick and easy and chain sewing friendly...

My favorite way to sew... Chain sewing, like chain smoking,
only MUCH Better for you!

Right off the machine, still attached by a thread...

IRON the seams toward the colored squares... I don't want any seams
showing behind that white....

Another view of the seams sewn toward the color.

After ironing all of my seams, I layed out my rows to make
sure I like the order in which the colors are going to line up.
There is NO need to lay a pattern like this out on the floor.  As
I looked at this something didn't feel right. 
Then it hit me, "OOPS!! I'm missing a whole ROW of blocks!!"

A short search it was, the kitty had stolen a row of blocks.  When I
tried to take her photo, however, she dropped her loot and ran!
So, here she is in all of her colorful glory, all 36x54 inches of her.
Now, I'm wondering if I should just make this the front and the
Bargello the back, but then I decided the Bargello should be
the front...

So, I sewed the two halves of the barello together and laid it out on
the back of the quilt to insure I had adequate clearance, and I did.

I had three blocks left over, so I decided to make a few pinwheels...
Although I have no idea why I did, or what I'm going to do with them!

I am going to quilt this soon... I am still messing around in Photoshop to decide exactly what to do with it, but I will definitely post it as soon as I have an idea of what I am going to do.

Of course my wife looked at it and said, "I like the colorful side better!"

Until Next Time,
Paul